

Import donors from a spreadsheet
Add or update many donors at once with a CSV file, what the import preview tells you, and where to see past imports.
Updated 3 min read
To add many donors at once, go to Donor Recognition → Donors, click Import CSV, choose your file, review what it will change, and import it. Donors are matched by the Name column, so importing the same file again updates those donors instead of creating duplicates. That makes it safe to re-import after every fundraising update. Integrations → Import history lists every import.
Import
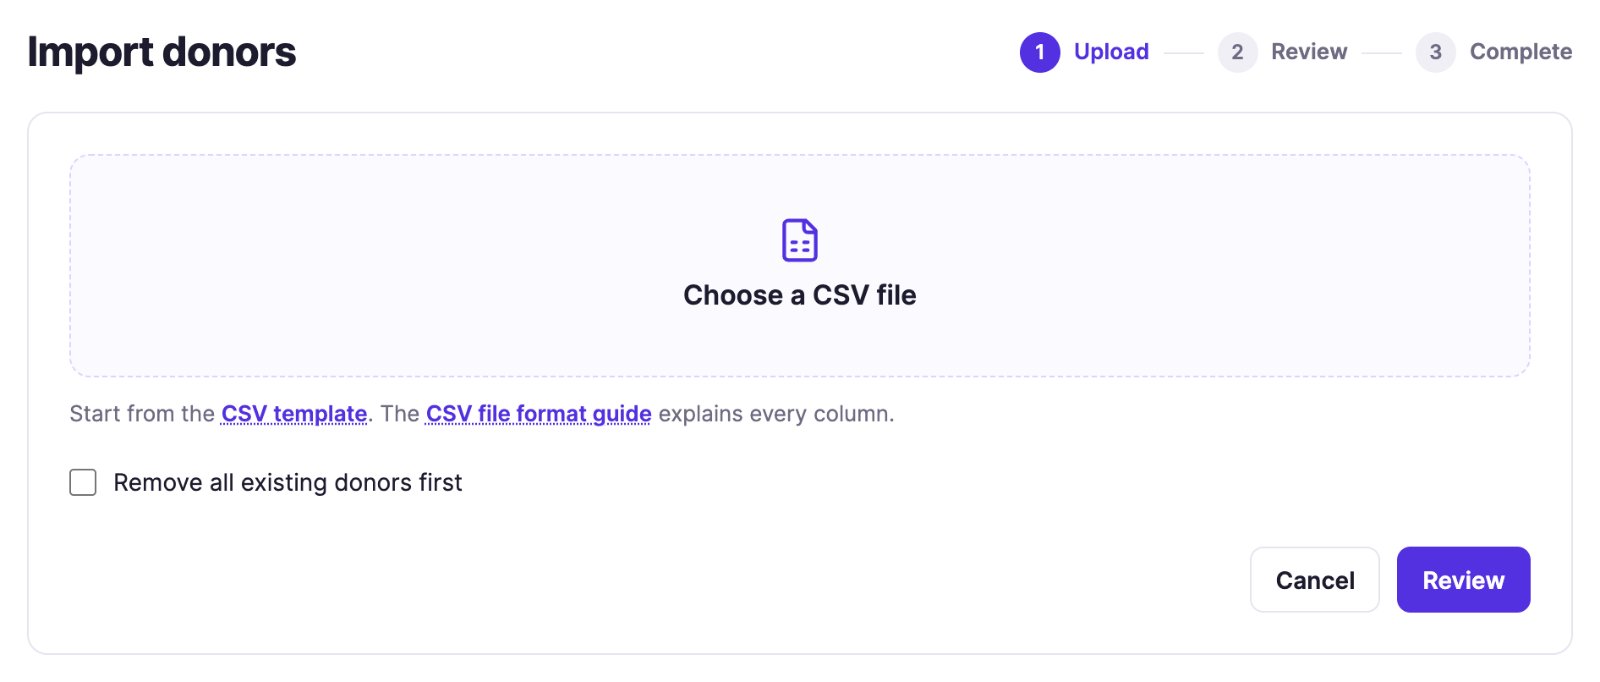
- Go to Donor Recognition → Donors and click Import CSV, or go to Integrations and click Import donors.
- Start from the CSV template and fill it in, one donor per row. Most spreadsheet apps can save as CSV. The CSV file format guide explains every column.
- Click Choose a CSV file, pick your file, and click Review.
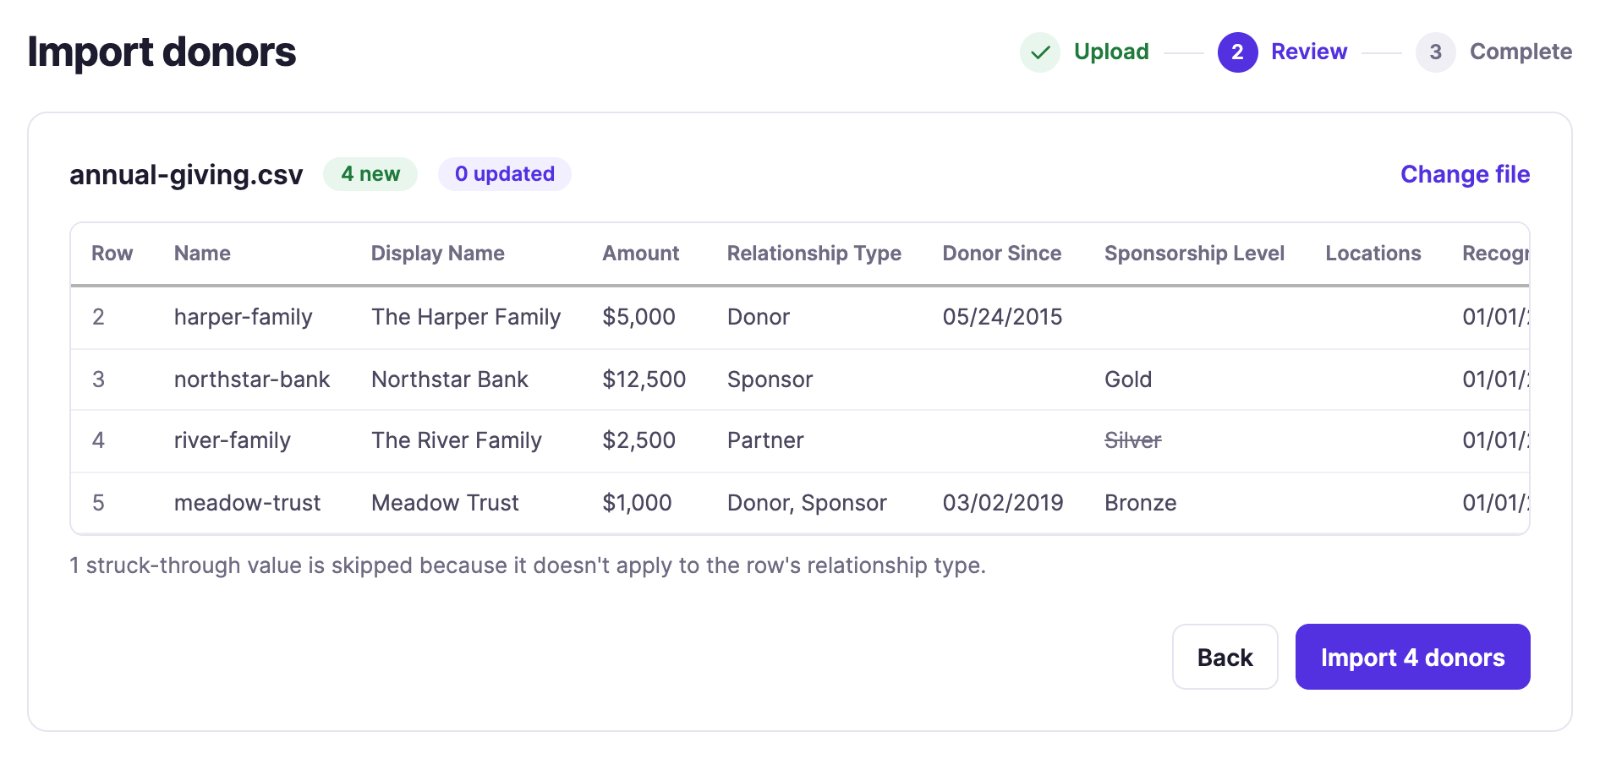
- Check the review: the file's rows, how many donors are new and how many are updated, and any errors. Nothing has changed yet.
- Click Import N donors, then Import to confirm.
Back on Donors, Last CSV import shows the date of this import.
Errors and skipped values
- Errors stop the import. A missing required value, a bad date or a duplicate Name is underlined in red; point at it for the reason, or click Show errors above the table. Fix the file, click Change file and choose it again.
- Struck-through values are skipped, not errors. A value that doesn't fit the row's relationship
type, such as a Sponsorship Level on a
Partnerrow, is left out and the row still imports. To keep it, add the right type to the row and choose the file again.
Re-importing and replacing
- Re-import to update amounts or dates: rows whose Name already exists are updated, new names are added. Keep each donor's Name the same every time.
- Images are kept. The file has no image column, so importing never changes or removes a donor's photo or logo. Add or change images on the donor, under Donor Recognition → Donors.
- Importing doesn't remove anyone. A donor who isn't in your new file stays on your list, and on your screens, until their recognition period ends. To take last event's sponsors off, end their recognition period, delete them, or use Remove all existing donors first. See Recognition periods.
- Remove all existing donors first deletes your whole list, including donor images, before importing. Use it only to start over; it can't be undone, and you'll have to add the images again. Only Owners see this option.
See past imports
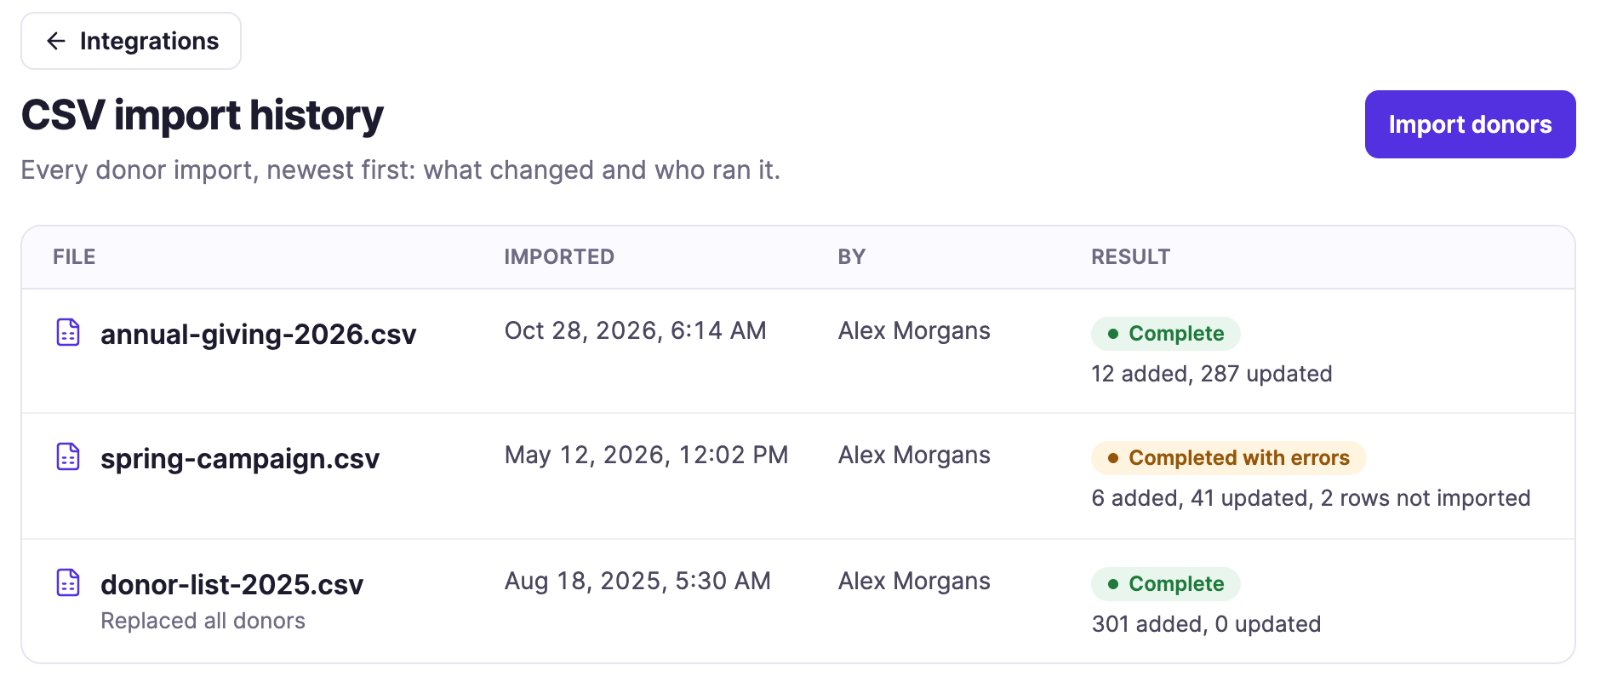
Go to Donor Recognition → Integrations and click Import history. Each import shows the file, when it ran, who ran it and what it changed. An import our support team ran for you shows their name followed by (Screen Pulse Support):
| Result | What it means |
|---|---|
| Complete | Every row was imported. The line below counts the donors added and updated. |
| Completed with errors | Some rows couldn't be imported; the rest were. Fix those rows and import the file again. |
| Failed | The import stopped before it finished. The reason is shown below. Check Donors, then import the file again. |
An import that used Remove all existing donors first says Replaced all donors.
Connect a CRM
Connecting a CRM isn't available yet. To tell us which CRM you use, go to Integrations and click Request an integration under CRM integration.
Also searched as: replace list, add donors, upload CSV, spreadsheet, keep logos, Excel.
Related articles
- CSV file format for donor imports Every column of the donor CSV file, the date formats it accepts, and how to write names that look good on screen.
- Donor recognition: from donor list to screen How your donor list feeds your Donor Recognition displays, and how to add, edit and find donors.
- Recognition periods: why a donor appears or disappears How long a donor is shown, and what to check when a donor is missing from a screen.
Still need help?
Our support team can walk you through it.