

Put your first content on screen
Upload images, build a playlist, publish it and assign it to your screen.
Updated 4 min read
On this page
To get content onto a screen, upload your images or videos, add them to a playlist, click Save & Publish, and assign the playlist to your screen with Set to Screen. The screen starts playing it within moments. This guide walks through it with a simple first playlist, such as a couple of posters and a clock.
Step 1: Upload your images and videos
Go to Media. Your library opens, with your folders on the left.
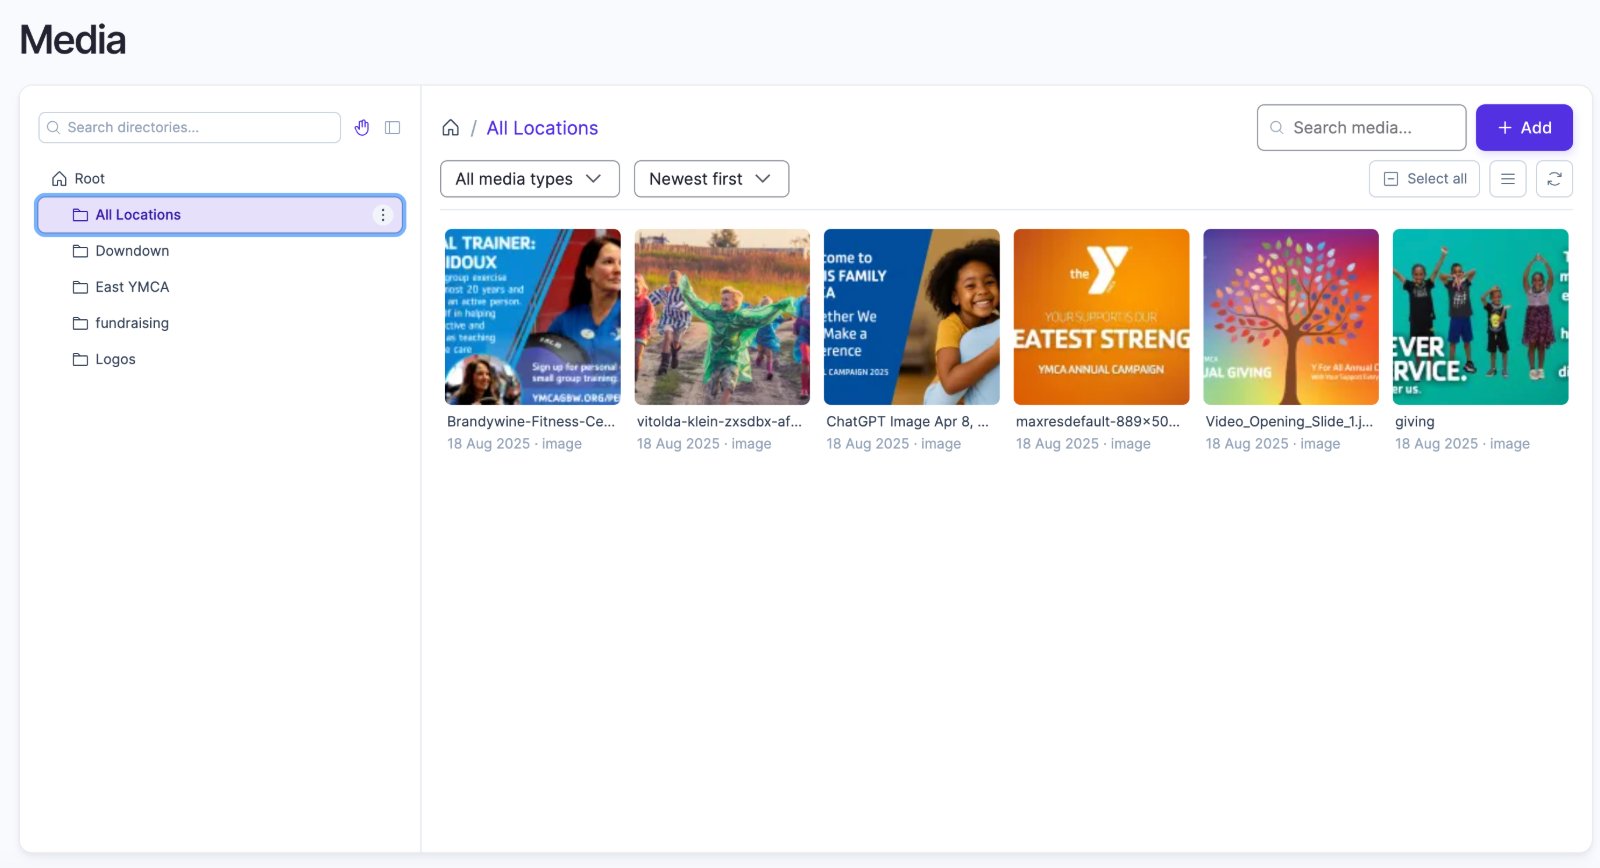
Optional: open a folder to keep things tidy, for example "Lobby posters".
Click + Add at the top right. In the Add Media window, choose the Image or Video tab, then drop your files in or click to browse.
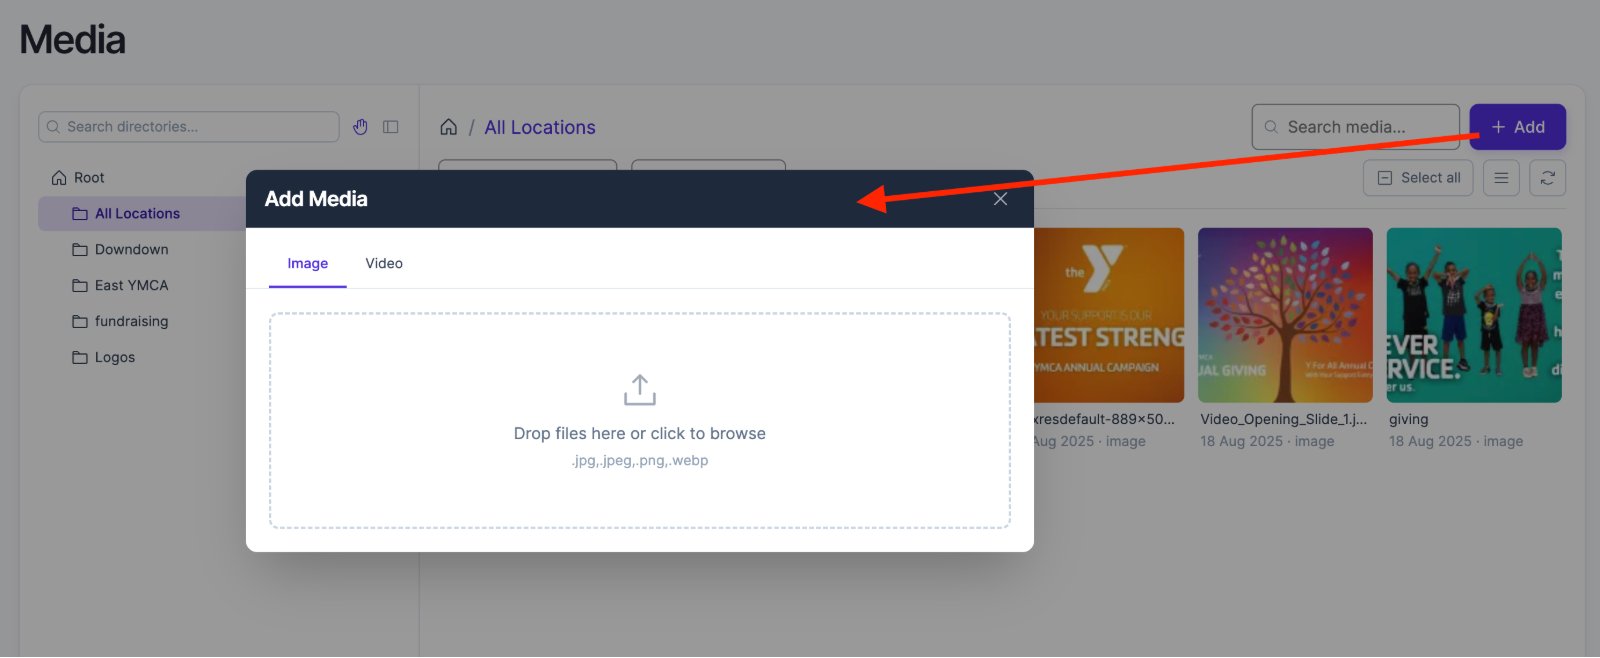
| Type | Formats | Max size |
|---|---|---|
| Images | JPG, JPEG, PNG, WEBP | 50 MB |
| Videos | MP4, WEBM | 50 MB |
Make content in the same shape as the screen. Create images and videos in the same aspect ratio as the TV that will show them, usually 16:9. Use 1920 × 1080 for a landscape TV and 1080 × 1920 for a portrait one, so content fills the screen without stretching or empty bands. See Designing content that looks good on a TV.
Step 2: Create a playlist
- Go to Playlists and click Create playlist.
- Enter a name at the top, for example "Lobby: main loop".
- Click Add content. On its Media tab, click the images or videos you uploaded, then Add (N) in the bar at the bottom. You can also upload new files here, with + Add at the top. See Pick content with Add content.
- Set how long each image plays. A new item gets a default length, shown next to it, that you can change. Videos always play for their full length.
- Drag items by their handle to change the order.
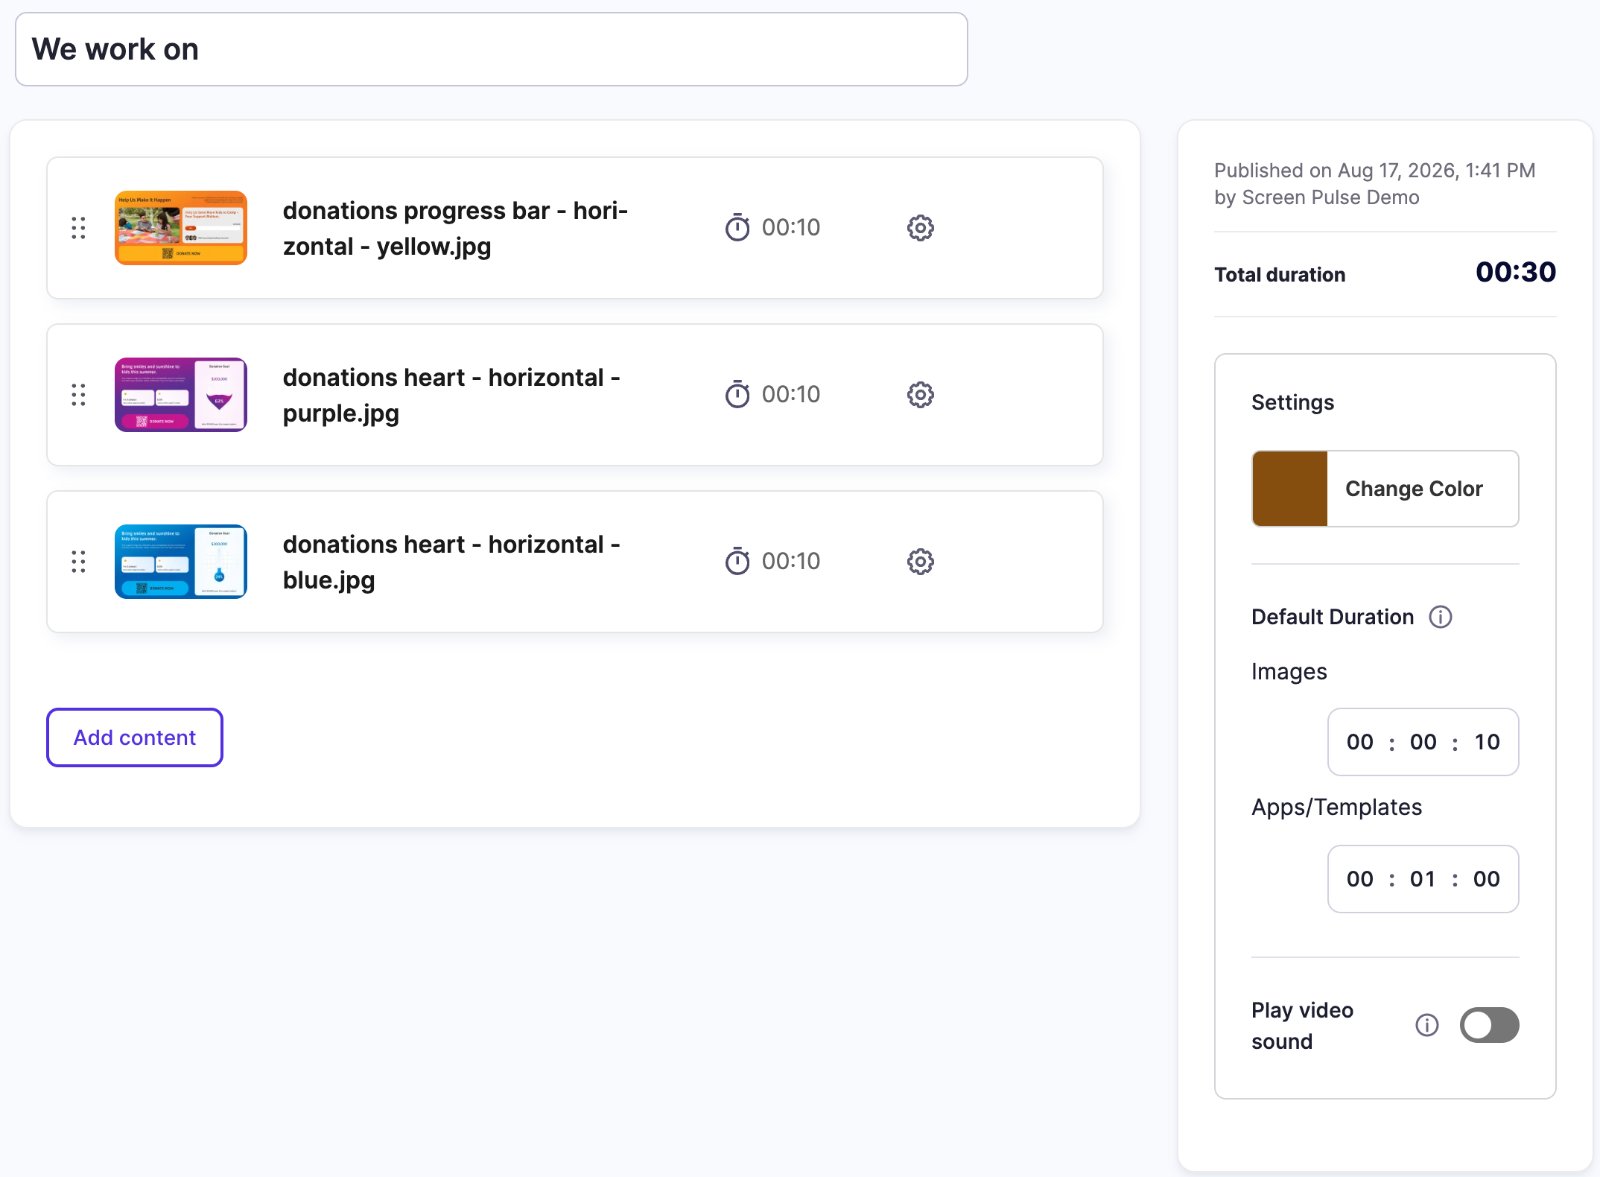
The total length is shown on the right, with the playlist's settings: its color, the default lengths for new images and apps, and Play video sound.
Step 3 (optional): Add a live app
Apps add live content, such as a clock, a countdown, today's class schedule or a YouTube video.
Turn it on: go to Apps → App Store, open the app, and turn it on for your organization.
Set it up: go to Apps → My Apps, open the app, click Create Instance, and fill in its settings (for a clock, your timezone and colors). You can preview it as you go.
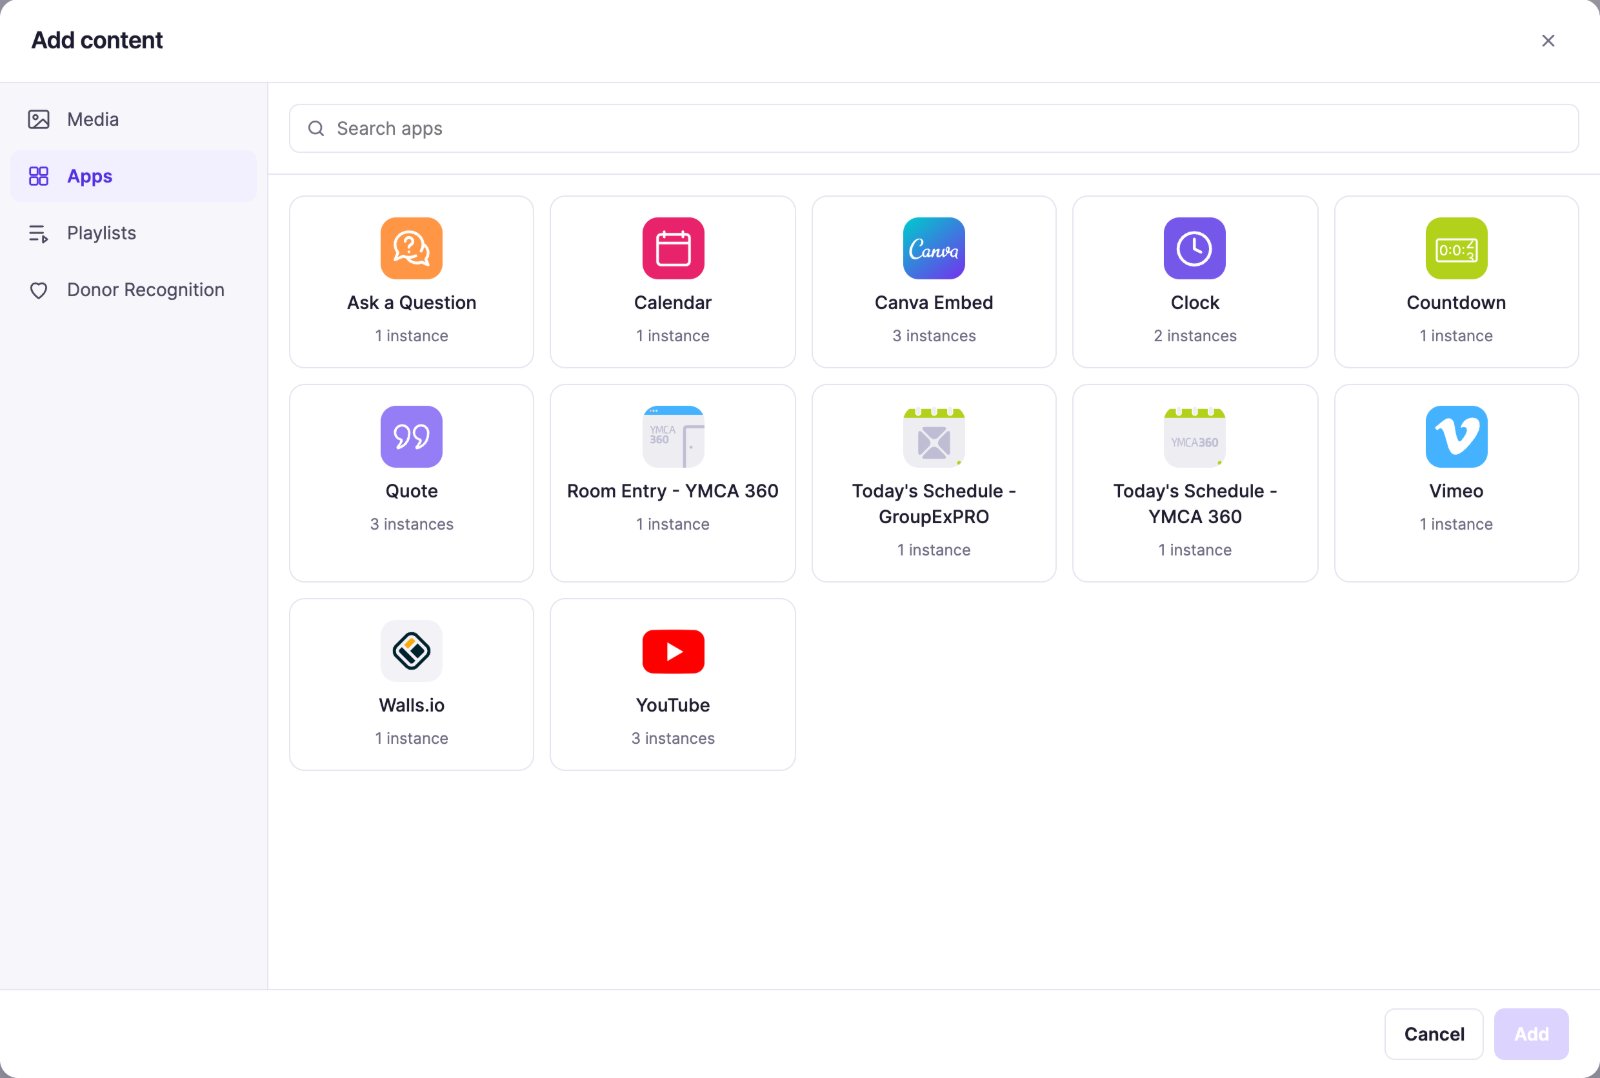
Add it: back in your playlist, click Add content and open Apps. Click the app, tick the instance you set up, and click Add 1 item.
Step 4: Publish the playlist
Click Save & Publish.
- Save & Publish makes the playlist live.
- Save Draft saves your work without sending it to screens. A draft never plays, even if it's assigned to a screen. In the list it shows "Draft Saved. Publish required."
Step 5: Assign it to your screen
Go to Playlists.
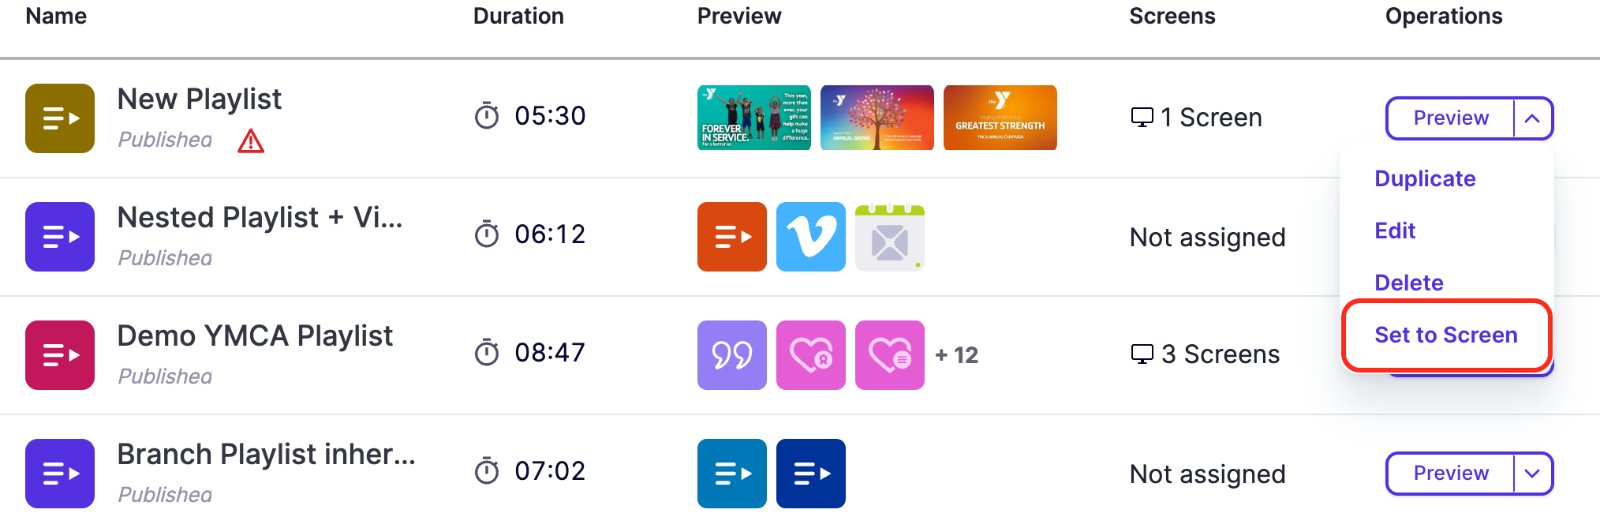
On your playlist's row, open the menu next to Preview and click Set to Screen.
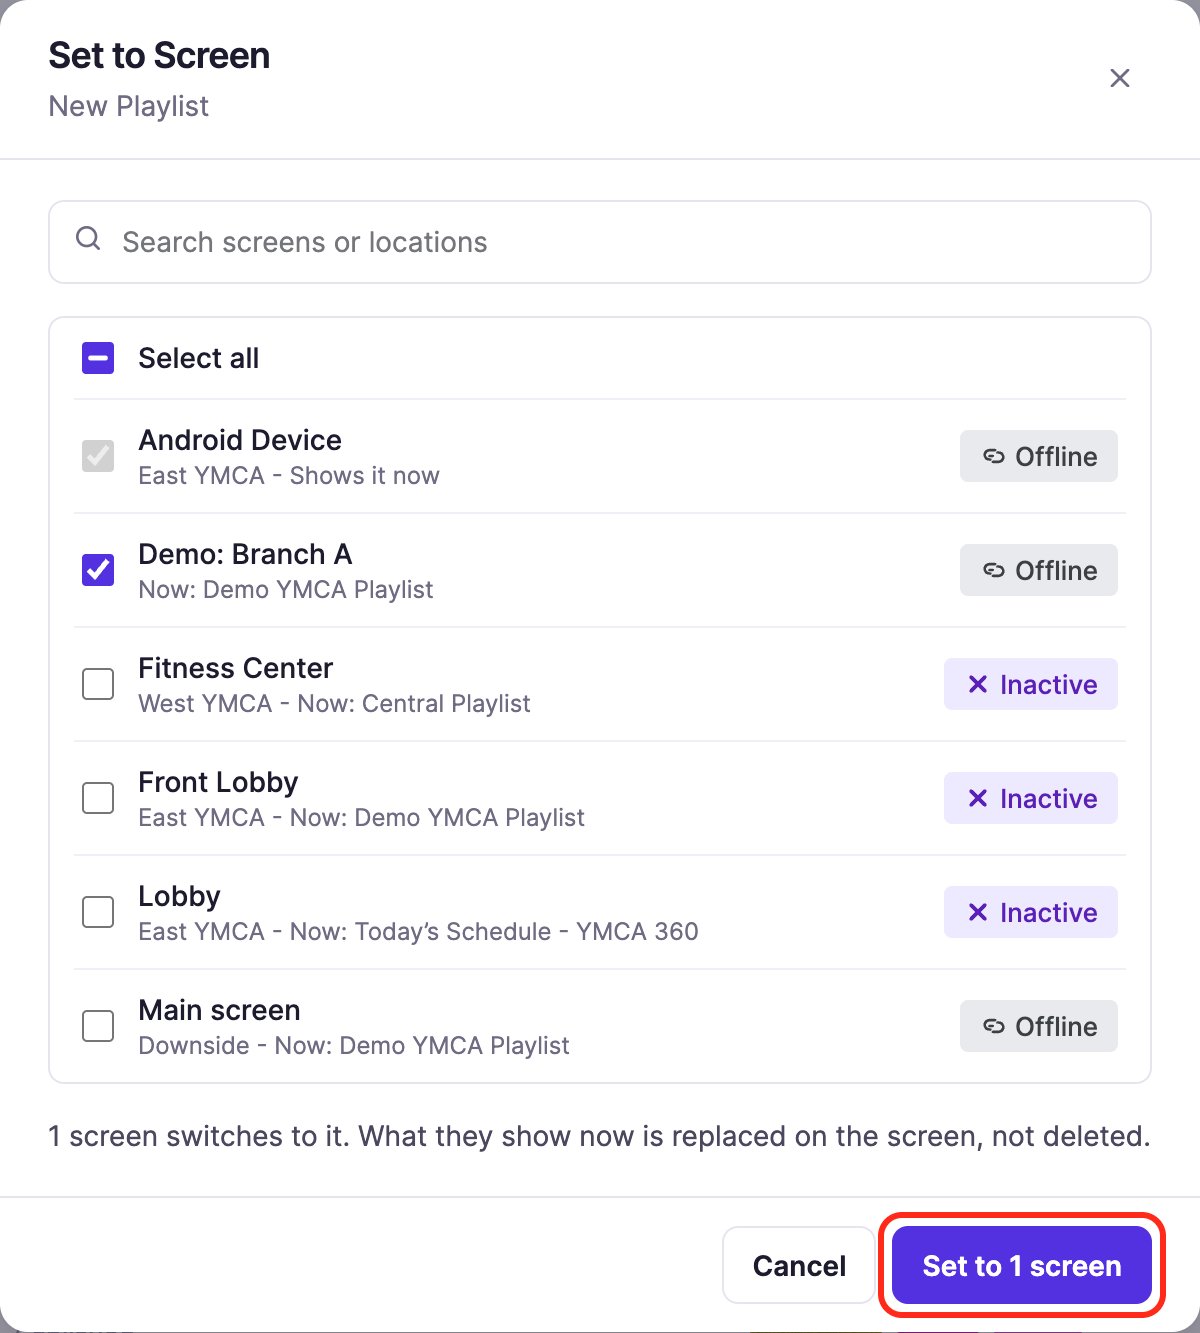
In the Set to Screen window, tick your screen, then click Set to 1 screen. With several screens, Search finds one by name or location, and Select all ticks them all.
The display switches to your playlist within moments, and the playlist loops continuously.
Check it without walking to the screen
Go to Screens and click Preview on the screen's row. It shows exactly what the display is playing, at the device's real resolution. Preview also works before a device is paired, so you can get the content right in advance.
Making changes later
- Edit and re-publish. Open the playlist, make your changes and click Save & Publish. Every screen using that playlist updates automatically, so you don't need to assign it again.
- Use one playlist on many screens. Assign the same playlist to several screens with Set to Screen.
- Each screen plays one thing at a time. Assigning a different playlist to a screen replaces what it was showing.
Not showing up?
| What you see | Likely cause |
|---|---|
| The screen still shows the old content or nothing | The playlist is still a draft. Open it and click Save & Publish. |
| The upload was rejected | The file is an unsupported format or over the size limit (see the table in step 1). |
| The screen shows Offline | The device has lost its internet connection, so it can't receive the new playlist. Check the network at the display. |
Related articles
Still need help?
Our support team can walk you through it.